How to Install Artificial Grass
Artificial grass installation can be completed with a few everyday tools, which if you don't have, can be purchased or rented at a local home improvement store like Home Depot or Lowes. Some of those tools include: sod cutter, plate compactor, seaming tape, flat head rake, push broom, 4"-6" carpet staples/flat head nails, wheel barrow, and carpet knife.
Elite Artificial Grass can install it for you or give you a simple instruction guide for you to follow if you should wish to tackle the artificial grass installation yourself. Just to give a quick explanation of an installation process, the following lists the steps:
Excavation (Preparing for your base)
1. Clear any existing grass or vegetation on area for turf, spray weed killer or grass blocker solution to ensure that no vegetation will grow under the turf area in the future.
2. Once you are ready, apply crushed stone aggregate (we recommend a 2"-3" layer of ¼" crushed stone). You can purchase this at your local home improvement store or building supply warehouse.
3. Once the crushed stone is applied, you will want to make sure the base is as level as possible. A plate compactor or sod roller may be useful for this step. NOTE: It is important to remember that the turf will be applied on top of this crushed stone base, thus any undulation on the surface will be visible once the turf has been applied. It is also important to remember that the crushed stone will aid in the drainage properties of the system, so a slight slope is recommended for proper drainage.
Now that your base is ready it's time to install your fake grass
4. Once you have laid the stone base you will want to roll out the turf according to your area measurements. (It is important to lay the turf with all grass fibers or blades going in the same direction to ensure that all pieces of turf match up.) *This step may not apply if you do not have multiple pieces or sections of turf.
5. Make cuts in the fake grass using a standard carpet knife to fit the turf to desired area. (You are essentially cutting the turf to create the exact shape of your area, so the fewer pieces of turf used the better; this will eliminate seaming pieces together). In the event you need to seam the turf together we recommend a 4"-6" indoor / outdoor carpet seaming tape. The tape is used to attach the pieces of turf together and not to secure it to the aggregate (crushed stone). Next, center the seaming tape along the edges. To do this, lift one side of the turf and adhere the seaming tape to it, gently lay the taped portion of the turf back down, place the adjoining seam on the centered tape and apply pressure (by walking) over the area. Lastly, check to make sure there isn't any overlapping or bunching of tape or turf.
6. Now you are ready to attach the fake lawn to your base. To attach the synthetic lawn to the base you will want to use 6"-8" carpet staple (these are essentially long nails). Drive in the staples 1" from the turf edge and every 6" along the turf perimeter. It is a good idea to start at one side of the application area so you can pull the turf tight from the other side. This process is the most important, so your turf is attached securely and properly. Drive in the staples around the perimeter of the area and on both sides of any seams. This ensures that the seam will not come up and the material is properly fixed to the base. Remember, the carpet staples hold the edges of the turf in place, while the infill will actually weigh the material down.
 Now that your fake lawn has been laid down onto your base, you are ready for the finishing touches
7. Next is to add the infill material of your choice. (The main purpose of the infill is to give the turf its' soft and life-like characteristics while weighing down the turf). We recommend a Sand infill. We also recommend using approximately 2 pounds of infill material per square foot of turf. You will want to evenly apply the infill material on top of the turf with a drop spreader; if you don't have a drop spreader you can do it by hand but this process will be more time consuming.
8. The final step, you will want to use a soft to medium bristled push broom to work the infill material into the turf. Keep working the infill material into the turf until the turf begins to stand upright. If you do not see the results you want, a flat-head rake is a good tool to use as well. NOTE: It is important to make sure that you brush the infill material against the grain of the turf; this allows the infill to work its way to the base of the fibers correctly. This is the precision step; you must brush in the infill evenly so its appearance is consistent. A simple check to make sure it's even is to walk over the turf and your feet will tell you if it's even or not. Work the infill in the turf until desired appearance is achieved.
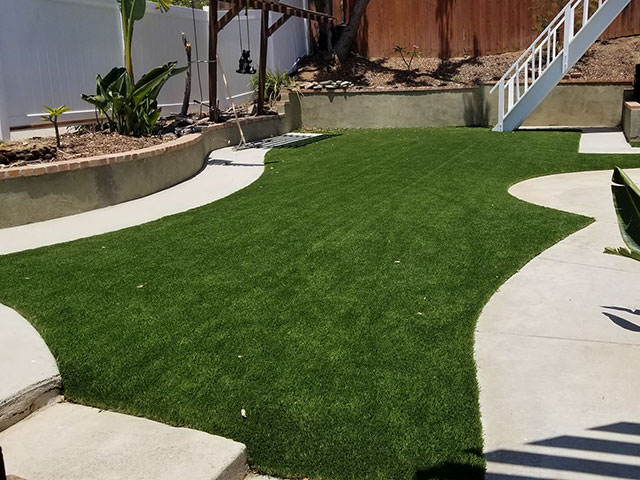
And there you have it! 8 simple steps to having a lawn that is always green and always beautiful! And if desired, you can add rocks, fencing, foliage or lights to enhance the look and feel of your new artificial lawn.
08/14/2020 How to measure Square Footage of a Yard
07/13/2020 Artificial Turf Melting
03/14/2020 COVID-19 & Cleanliness
01/28/2020 How Do I Clean Artificial Turf?
03/08/2019 Will Weeds Grow Through Synthetic Grass?
02/27/2019 Artificial Grass Eliminates Pests
01/24/2019 Dog Run Ideas: Groundcover Options
11/30/2017 Installing a Putting Green
9/20/2017 How to Improve your Golf Game
06/31/2017 How to Find the Right Contractor for the Job
05/13/2017 Cost of Artificial Grass
04/15/2017 Pros & Cons of Turf
03/15/2017 I Can't Afford Turf! YES YOU CAN!
2/20/2017 California Drought News
01/04/2017 Have a Perfect Lawn with NO Effort!
12/22/2016 Installing Artificial Grass
11/01/16 Benefits of Artificial Grass for Dogs
10/18/2016 20 Ways to Conserve Water